Wednesday, March 30, 2011

Michael - Step 7


The jagged strip of white on the sleeve in step 5 wasn't terribly descriptive, so I added more light strokes to indicate the turn of the sleeve.  I also painted in more of the dark sweater over the initial tone in back of the arm and brought it around the front of the shoulder/sleeve.  The background needed a smidge of softening around the face - so that ancillary contrast didn't distract from the face.

Up Next - Completion

Monday, March 28, 2011

Michael - Step 6


Refinements . . .. Some edges needed softening - like on the forehead - while some needed sharpening or changing - such as around the eyes and mouth.  The missing nostril wandered back into place and some additional cool highlights were added to the background.

Up Next . . . The shirt and sweater.

Tuesday, March 15, 2011

Michael - Step 5


At this stage I pull out a smaller brush and begin refining the features - following the "general to specific" pattern.  It's helpful if the edges aren't really hard at this stage so that I can choose which edges will be hard at a future stage of refinement (it's usually easier for me to paint a hard edge than a soft edge).

Next Up. . . Refining the broader areas (and the missing nostril).


Saturday, March 12, 2011

Michael - Step 4


After putting in the darks and some lights, it's the midtones' turn - again, going from dark to light.

Next up . . . Refinements

Friday, March 4, 2011

Michael - Step 3


I generally follow two simple rules when painting in oils:

Dark to Light
and
Back to Front

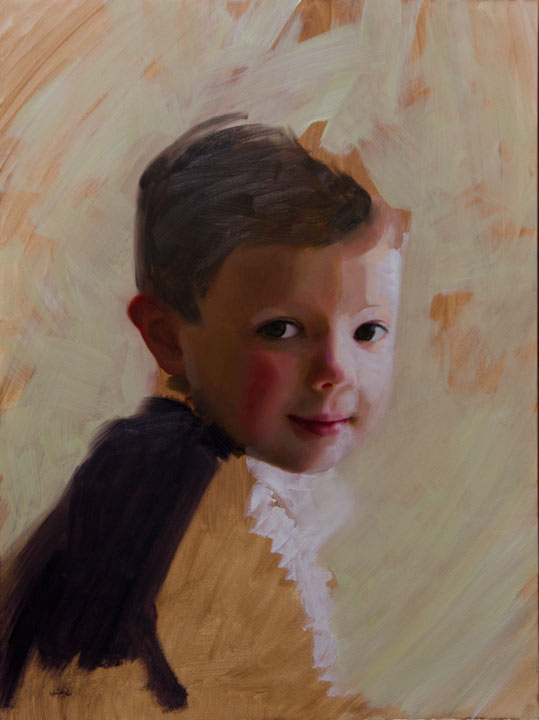
Basically, I've found that when I'm modeling a form it works out best to paint the darks first and then add the lights.  It just doesn't work as well going the other way.  This does not apply when I'm not modeling form - such as the silhouette of a dark tree branch in front of a bright cloud.  In fact, this is a good illustration of my other rule - back to front.  It is generally better to paint things that are behind other things first.  It helps with edge quality - plus, think how hard it would be to paint a tree and then try to paint a cloud peaking through each tree branch (although I do know of an artist that does this!)  Now back to the first rule - if the branches were one color but the trunk needed modeling, I would add the lights to the dark of the trunk, I wouldn't paint the trunk light and then try to paint the shadow.

In this step 3 of "Michael", I've started putting in the darks.

Up Next - Going towards the light - filling out the midtones.